This article will guide you through the process of:
- Activating your HIVE license for use with Microsoft Stream
- Enabling HIVE within the Microsoft Stream Admin Settings
Before you begin
Before you can begin, you must have:
Activating your HIVE license for Stream
NOTE: You must Activate your HIVE license for Stream before attempting to enable HIVE in the Microsoft Stream Admin Settings. DO THIS FIRST.
Enabling Hive for your Stream tenant
A Stream Admin account must be used to configure the Stream tenant to use Hive Streaming.
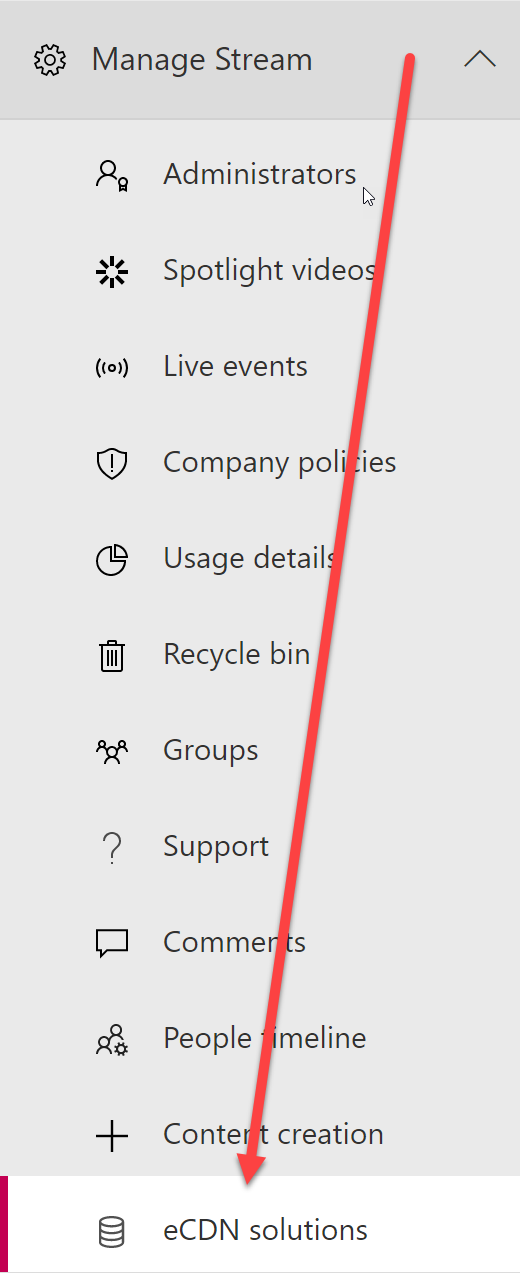
- First, select Admin settings from the Settings menu.
- Next, select Network caching settings:
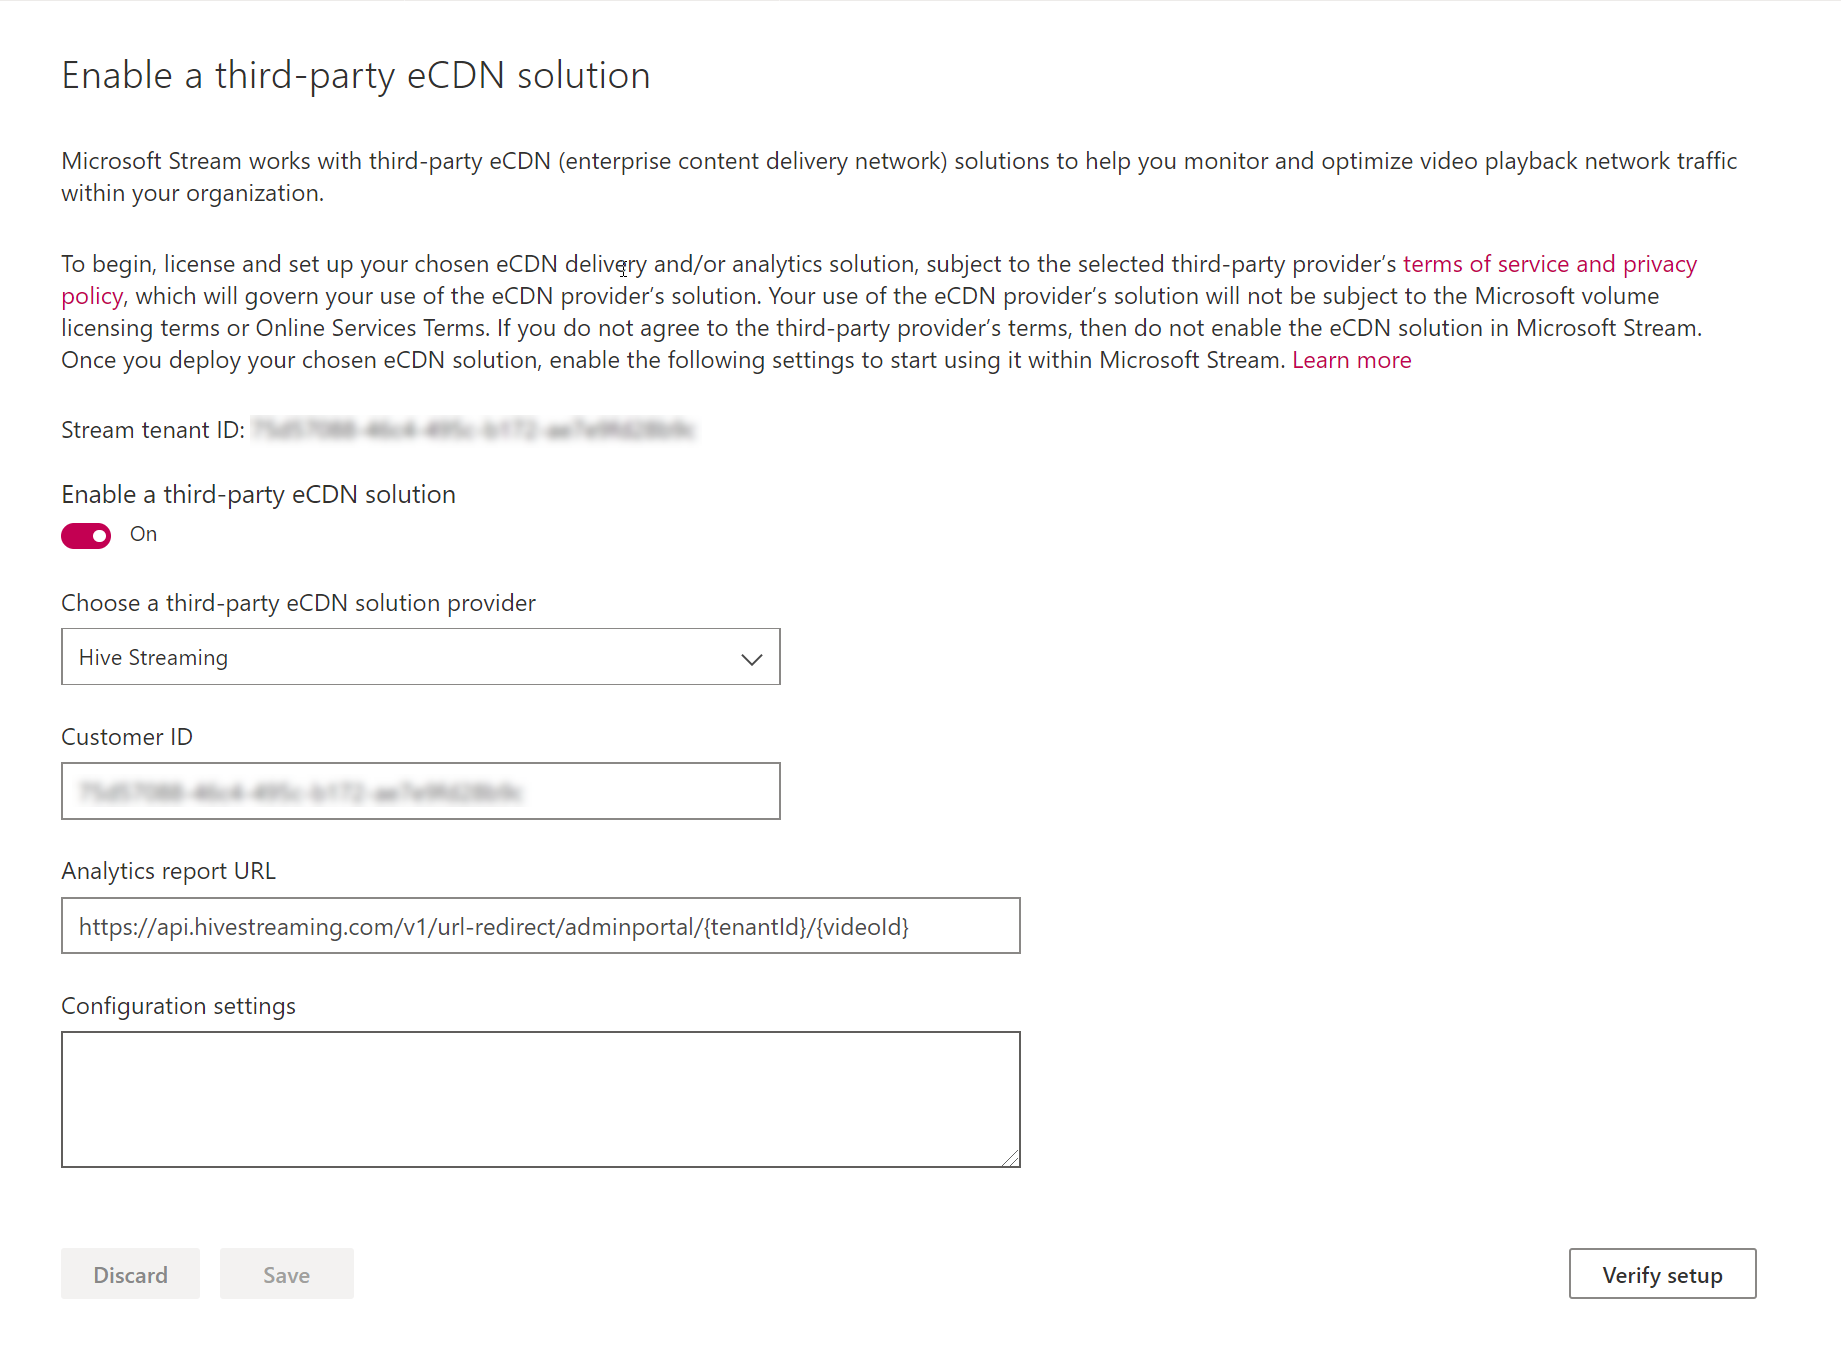
- You will see the eCDN solutions settings page:
- Populate the settings as follows:
- Choose a third-party eCDN solution provider: select Hive Streaming from the drop-down list
- Customer ID copy + paste (CTRL-C + CTRL-V) the "Stream tenant ID" listed at the top of the page into this field.
- Analytics report URL: copy + paste (CTRL-C + CTRL-V) the following string AS IS (no replacements):
- Configuration settings: If you wish to disable Hive for VoD (live events will remain Hive-enabled), insert the following text in the Configuration Settings field exactly as follows: {"disableHiveForVod":true}. Otherwise, leave this field blank.
- Click Save.
Verifying the Setup
You can click the Verify setup button to verify the HIVE settings have been accepted and are working with video in your Stream tenant.
What's Next
- You are now ready to stream HIVE-enabled Microsoft Stream events!


